What is VueJs Routing | VueJs Tutorials
VueJs – Routing
VueJS does not have a built-in router feature. We need to follow some additional steps to install it.
Direct Download from CDN
Unpkg.com provides npm-based cdn links. We can download and host it, and use it with a script tag along with vue.js as follows −
<script src = "/path/to/vue.js"></script>
<script src = "/path/to/vue-router.js"></script>
Using NPM
Run the following command to install the vue-router.
npm install vue-routerUsing GitHub
We can clone the repository from GitHub as follows −
git clone https://github.com/vuejs/vue-router.git node_modules/vue-router
cd node_modules/vue-router
npm install
npm run build
Let us start with a simple example using vue-router.js.
Example
<html>
   <head>
      <title>VueJs Instance</title>
      <script type = "text/javascript" src = "js/vue.js"></script>
      <script type = "text/javascript" src = "js/vue-router.js"></script>
   </head>
   <body>
      <div id = "app">
         <h1>Routing Example</h1>
         <p>
            <router-link to = "/route1">Router-1</router-link>
            <router-link to = "/route2">Router-2</router-link>
         </p>
         <!-- route outlet -->
         <!-- component matched by the route will render here -->
         <router-view></router-view>
      </div>
      <script type = "text/javascript">
         const Route1 = { template: '<div style = "border-radius:20px;background-color:red;width:200px;height:50px;margin:10px;font-size:25px;padding:10px;">This is router 1</div>' }
         const Route2 = { template: '<div style = "border-radius:20px;background-color:green;width:200px;height:50px;margin:10px;font-size:25px;padding:10px;">This is router 2</div>' }
         const routes = [
            { path: '/route1', component: Route1 },
            { path: '/route2', component: Route2 }
         ];
         const router = new VueRouter({
            routes // short for `routes: routes`
         });
         var vm = new Vue({
            el: '#app',
            router
         });
      </script>
   </body>
</html>
Output
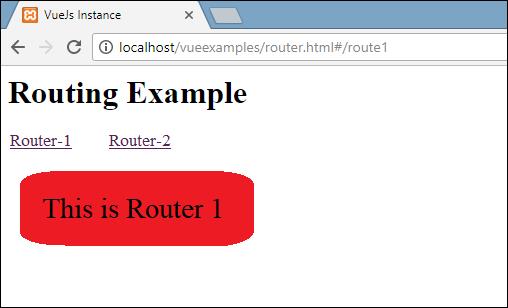
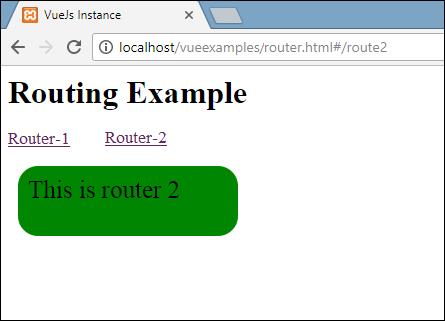
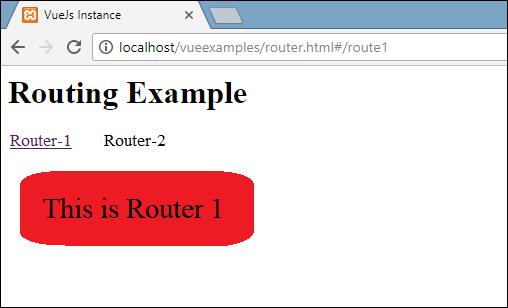
To start with routing, we need to add the vue-router.js file. Take the code from https://unpkg.com/vue-router/dist/vue-router.js and save it in the file vue-router.js.
The script is added after vue.js as follows −
<script type = "text/javascript" src = "js/vue.js"></script>
<script type = "text/javascript" src = "js/vue-router.js"></script>
In the body section, there is a router link defined as follows −
<p>
   <router-link   to = "/route1">Router-1</router-link>
   <router-link    to = "/route2">Router-2</router-link>
</p>
<router-link> is a component used to navigate to the HTML content to be shown to the user. The to property is the destination, i.e the source file where the contents to be shown will be picked.
In the above bit of code, we have made two router links.
Have a look at the script section where the router is instated. There are two constants created as follows –
const  Route1 = { template: '<div style = "border-radius:20px;background-color:cyan;width:200px;height:50px;margin:10px;font-size:25px;padding:10px;">This is router 1</div>' };
const Route2 = { template: '<div style = "border-radius:20px;background-color:green;width:200px;height:50px;margin:10px;font-size:25px;padding:10px;">This is router 2</div>' }
They have templates, which need to be shown when the router link is clicked.
Next, is the routes const, which defines the path to be displayed in the URL.
const routes = [
   { path: '/route1', component: Route1 },
   { path: '/route2', component: Route2 }
];
Routes define the path and the component. The path i.e. /route1 will be displayed in the URL when the user clicks on the router link.
Component takes the templates names to be displayed. The path from the routes need to match with the router link to the property.
For example, <router-link to = ”path here”></router-link>
Next, the instance is created to VueRouter using the following piece of code.
const router = new VueRouter({
   routes // short for `routes: routes`
});
The VueRouter constructor takes the routes as the param. The router object is assigned to the main vue instance using the following piece of code.
var vm = new Vue({
   el: '#app',
   router
});
Execute the example and see the display in the browser. On inspecting and checking the router link, we will find that it adds class to the active element as shown in the following screenshot.
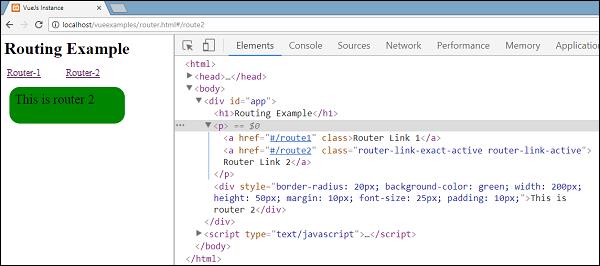
The class added is class = "router-link-exact-active router-link-active". The active link gets the class as shown in the above screen capture. One more thing to notice is, the <router-link> gets rendered as a tag.
Props for Router Link
Let us see some more properties to be passed to <router-link>.
to
This is the destination path given to the <router-link>. When clicked, the value of to will be passed to router.push() internally. The value needs to be a string or a location object. When using an object, we need to bind it as shown in e.g. 2.
e.g. 1:  <router-link to = "/route1">Router-1</router-link>
renders as
<a href = ”#/route”>Router Link </a>
e.g. 2:  <router-link v-bind:to = "{path:'/route1'}">Router-1</router-link>
e.g. 3: <router-link v-bind:to =
   "{path:'/route1', query: { name: 'Kick' }}">Router-1</router-link>//router link with query string.
Following is the output of e.g. 3.
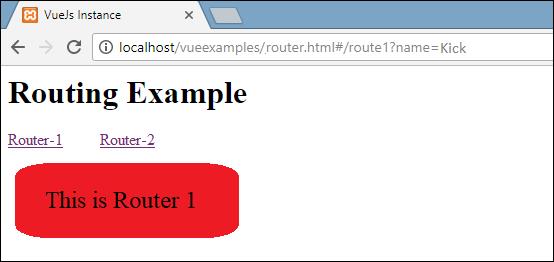
In the URL path, name = Kick is a part of the query string. E.g.: http://localhost/vueexamples/router.html#/route1?name = Kick
replace
Adding replace to the router link will call the router.replace() instead of router.push(). With replace, the navigation history is not stored.
Example
<router-link v-bind:to = "{path:'/route1', query: { name: 'Kick' }}" replace>Router-1</router-link>append
Adding append to the <router-link><router-link> will make the path relative.
If we want to go from the router link with path /route1 to router link path /route2, it will show the path in the browser as /route1/route2.
Example
<router-link v-bind:to = "{ path: '/route1'}" append>Router -1</router-link>tag
At present <router-link> renders as a tag. In case, we want to render it as some other tag, we need to specifty the same using tag = ”tagname”;
Example
<p>
   <router-link v-bind:to = "{ path: '/route1'}" tag = "span">Router -1</router-link>
   <router-link v-bind:to = "{ path: '/route2'}" tag = "span">Router-2</router-link>
</p>
We have specified the tag as span and this is what is displayed in the browser.

The tag displayed now is a span tag. We will still see the click going as we click on the router link for navigation.
active-class
By default, the active class added when the router link is active is router-link-active. We can overwrite the class by setting the same as shown in the following code.
<style>
   ._active{
      background-color : yellow;
   }
</style>
<p>
   <router-link v-bind:to = "{ path: '/route1'}" active-class = "_active">Router-1</router-link>
   <router-link v-bind:to = "{ path: '/route2'}" tag = "span">Router-2</router-link>
</p>
The class used is active_class = ”_active”. This is the output displayed in the browser.

exact-active-class
The default exactactive class applied is router-link-exact-active. We can overwrite it using exact-active-class.
Example
<p>
   <router-link v-bind:to = "{ path: '/route1'}" exact-active-class = "_active">Router -1</router-link>
   <router-link v-bind:to = "{ path: '/route2'}" tag = "span">Router-2</router-link>
</p>
This is what is displayed in the browser.

event
At present, the default event for router-link is clicked event. We can change the same using the event property.
Example
<router-link v-bind:to = "{ path: '/route1'}" event = "mouseover">Router-1</router-link>Now, when we mouseover the router link, it will navigate as shown in the following browser. Mouseover on the Router-1 and we will see the navigation changing.
